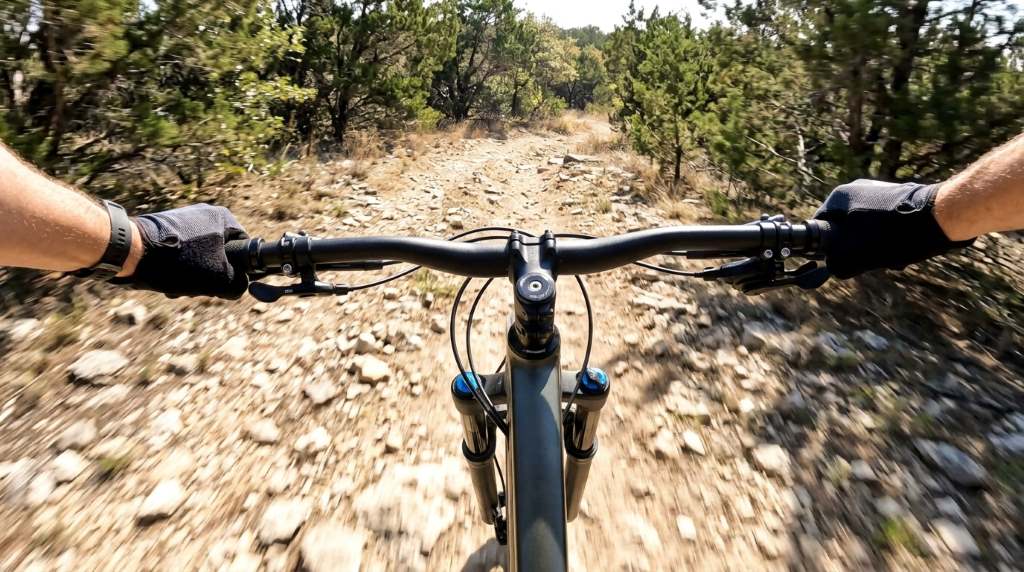
How to Stop Front Wheel Wobble on Austin, TX Trails
To stop front wheel wobble on Austin, TX trails, first check tire pressure, axle security, headset tension, wheel alignment, and bearings. Spend about 5 minutes on these checks before riding, because a loose axle or headset can quickly turn a minor wobble into a serious handling problem.
Austin’s mix of paved paths, rocky sections, roots, and uneven trail surfaces exposes weaknesses that smooth roads often hide. Whether you ride a mountain bike or tow a multi sport child bike trailer, stable steering remains essential for predictable control.
Key Takeaways
- Check tire pressure before adjusting mechanical components.
- Secure the front axle and inspect the wheel for side-to-side movement.
- Test headset play by holding the front brake and rocking the bike.
- Inspect spokes, bearings, rim condition, and tire seating carefully.
- Lower excessive speed when Austin trails become rocky or root-filled.
- Replace damaged components instead of trying to ride through instability.
Start With the Front Wheel and Tire
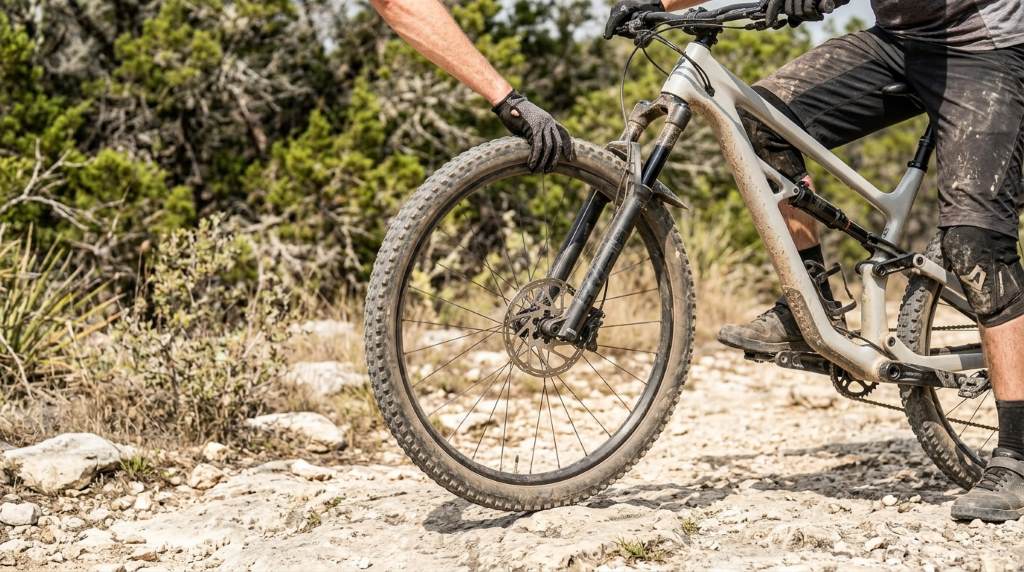
Begin with the simplest possible explanation: your tire or wheel may cause the wobble. Place the bike on stable ground, then spin the front wheel slowly while watching its relationship with the fork.
Look for obvious lateral movement, an uneven tire bead, or a rim that moves toward either fork leg. Next, inspect the tire sidewall for cuts, bulges, embedded debris, or signs of uneven wear.
Tire pressure also matters because Austin trails demand different traction characteristics from smooth pavement. A severely overinflated tire can bounce across roots, while insufficient pressure can create vague steering and rim impacts.
Use your tire manufacturer’s recommended range as the starting point, then adjust gradually for your weight and riding conditions. If the wobble changes significantly after correcting pressure, investigate the tire and rim before chasing other causes.
Check Whether the Wheel Sits Straight
Release the front brake and examine the clearance between the rim and both fork legs. The gap should remain reasonably consistent as the wheel rotates.
If the rim moves noticeably from side to side, the wheel may need truing. However, do not randomly tighten spokes unless you understand wheel tension and truing principles.
A professional bicycle shop can correct uneven spoke tension while preserving proper wheel strength. This approach usually makes more sense than experimenting with individual spokes without the right tools.
Inspect the Axle, Fork, and Wheel Installation
A loose front axle can create movement that feels exactly like a steering wobble. Therefore, inspect the axle before assuming that your wheel needs replacement or truing.
Remove and reinstall the wheel according to your fork manufacturer’s instructions. Make sure the axle engages correctly, the wheel sits fully inside the dropouts, and the locking mechanism closes securely.
If you ride frequently on rough surfaces, inspect your cheap mountain bikes under 300 options carefully before buying a budget replacement. A low purchase price means little if the bike uses poorly finished components that compromise steering confidence.
Also inspect the fork for visible damage, unusual scratches, dents, or signs of twisting. Never continue riding aggressively when the fork shows structural damage or develops unexplained movement.
Test the Front Wheel for Play
Hold the handlebar firmly and try moving the wheel sideways with moderate hand pressure. A properly installed front wheel should feel firmly connected to the fork.
If you feel clicking, knocking, or noticeable lateral movement, stop and investigate further. That movement can indicate loose bearings, an improperly secured axle, damaged hub components, or another mechanical problem.
Do not confuse normal suspension movement with wheel looseness. Lock the suspension if possible, then repeat the test to isolate the source more accurately.
Check the Headset for Steering Play
The headset connects your fork and front wheel assembly to the frame, so even slight looseness can produce unstable steering. Fortunately, you can perform a basic headset check without specialized equipment.
Stand beside the bike and squeeze the front brake firmly. Then gently rock the bicycle forward and backward while placing your fingers around the headset area.
If you feel a distinct knock beneath your fingers, the headset may have excessive play. You should address that problem before riding technical trails because steering precision depends on a stable headset.
For a broader maintenance routine, review this how to maintain a mountain bike approach alongside your headset inspection. Regular checks help you catch loose components before trail vibration makes them worse.
Understand the Difference Between Loose and Damaged
A loose headset sometimes needs adjustment, but adjustment cannot repair worn bearings or damaged races. Tightening everything aggressively can create another problem by making steering stiff or damaging headset components.
Turn the handlebars slowly from left to right and notice any rough spots, grinding, resistance, or unnatural stiffness. Smooth movement should feel consistent throughout the steering range.
If the headset feels both loose and rough, professional inspection makes more sense than repeated tightening. Replace damaged bearings or races when adjustment no longer restores smooth operation.
Inspect Bearings, Spokes, and Pedal Control
Front hub bearings can develop play after repeated exposure to water, dirt, impacts, and inadequate maintenance. Spin the wheel and listen for grinding, clicking, or irregular resistance.
Next, hold the rim and gently push it sideways while keeping the fork stationary. Movement at the hub can indicate bearing wear, while movement elsewhere may point toward axle or wheel problems.
Rough trails also magnify poor rider control, especially when your contact points limit stability. Choosing appropriate components can improve confidence, and these bike pedals control comfort considerations can help create a more controlled riding position.
Check your pedals, shoes, and handlebar position if the bike itself passes every mechanical inspection. A rider who struggles to maintain a stable body position can interpret normal trail feedback as front-end instability.
Inspect Spoke Tension Without Guesswork
Lightly squeeze neighboring spokes and compare their tension across the wheel. A dramatically loose spoke deserves attention, particularly when the wheel also shows lateral movement.
Do not treat spoke tension as a simple tightening exercise. Wheels depend on balanced tension around the entire rim, so isolated adjustments can make the wheel less stable.
Look for broken spokes, damaged nipples, visible rim cracks, or dents around the spoke holes. Replace compromised components before returning to rocky trails or higher speeds.
Adjust Your Riding Technique for Austin Trails
Even a mechanically sound bicycle can feel unstable when the rider approaches technical terrain too aggressively. Austin trails can combine loose dirt, exposed roots, rocks, tight turns, and sudden elevation changes.
Keep your eyes farther ahead instead of staring directly at the front tire. This gives your body more time to anticipate obstacles and lets the bicycle track naturally beneath you.
Maintain a relaxed grip rather than squeezing the handlebar continuously. A rigid upper body can amplify every impact and make the front wheel feel more nervous than it actually is.
Control Speed Before Technical Sections
Reduce speed before entering rocky or root-covered sections rather than braking heavily while crossing them. This strategy keeps the front suspension and tire working more predictably.
Use both brakes progressively and avoid abrupt front-brake inputs while the wheel crosses loose surfaces. Sudden braking can unload or overload the front tire and create a momentary loss of directional stability.
When approaching a turn, establish your speed before leaning into the corner. Then focus on your exit line instead of making repeated steering corrections through the turn.
Use a Simple Pre-Ride Wobble Test
A short inspection before every demanding ride can catch many problems before they reach the trail. You only need a few deliberate checks to identify obvious mechanical issues.
Start by squeezing both brake levers and confirming firm engagement. Then lift the front wheel, spin it, and watch for unusual rim or tire movement.
Next, check the axle, headset, and hub for unwanted movement. Finally, inspect the tire tread and sidewalls for damage that could affect traction or steering.
Five-Minute Pre-Ride Checklist
- Tire: Confirm appropriate pressure and inspect for cuts or bulges.
- Wheel: Spin the rim and watch for significant lateral movement.
- Axle: Confirm proper seating and secure closure.
- Headset: Test for knocking while holding the front brake.
- Hub: Check for grinding, looseness, or unusual resistance.
- Fork: Look for damage, cracks, dents, or unexplained movement.
If any check produces a serious concern, postpone the ride until you identify the cause. A five-minute inspection costs far less than recovering from a preventable crash or component failure.
When You Should Stop Riding
Not every wobble requires immediate professional service, but certain symptoms demand caution. Stop riding when the front wheel moves significantly, the axle will not secure properly, or the fork shows structural damage.
Also stop when the headset produces repeated knocking, the hub develops substantial play, or the rim contains a crack. These problems can compromise steering control and worsen rapidly on rough terrain.
Do not attempt a trail-side repair that requires specialized knowledge if you cannot verify the result. Walking the bicycle out or arranging transportation remains safer than testing an uncertain repair at speed.
How to Prevent Front Wheel Wobble Later
Prevention starts with consistent maintenance rather than waiting for obvious instability. Clean the bicycle after particularly dirty rides and inspect high-stress components regularly.
Pay special attention after crashes, hard impacts, deep potholes, and aggressive trail sessions. Even when the bicycle appears normal, an impact can alter wheel alignment or loosen a component.
Keep a basic maintenance kit with appropriate tire equipment and the tools required for your axle system. Learning your bicycle’s basic specifications also makes troubleshooting faster and more accurate.
Schedule professional service when wheel truing, bearing replacement, headset servicing, or fork inspection exceeds your experience. A qualified mechanic can identify subtle wear that a home inspection may miss.
Conclusion
Front wheel wobble usually has a practical cause, and careful inspection can often identify it before your next Austin trail ride. Start with tire pressure and wheel installation, then examine the axle, headset, hub, spokes, fork, and riding technique.
Do not ignore persistent wobble simply because the bicycle still moves forward. Use the checks above, repair questionable components, and test the bike at low speed before returning to technical terrain.
Ready to ride more confidently? Give your front end a complete five-minute inspection before your next trail session, and have a bicycle professional examine anything you cannot verify safely.
FAQs
Why does my front bike wheel wobble on rough trails?
Loose components, incorrect tire pressure, wheel damage, worn bearings, or rider input can cause front wheel wobble.
Can low tire pressure cause front wheel wobble?
Yes, excessively low pressure can make the front tire feel unstable and increase rim impacts on rough terrain.
How do I check if my headset is loose?
Hold the front brake, rock the bike gently, and feel for knocking around the headset.
Is a slightly bent front wheel safe to ride?
A minor deviation may remain rideable, but significant wobbling, cracks, or damaged spokes require immediate inspection.
Should I ride with a persistent front wheel wobble?
No, stop riding aggressively until you identify and correct the mechanical or setup problem.