How to Choose the Best Bike Pedals for Better Control and Comfort
You’ve upgraded the saddle, dialed in the suspension, and swapped the tires—but your feet are still slipping on cheap plastic pedals. That little lost connection between your shoe and the crank robs you of power, control, and confidence on every ride. The truth is, the do more than just hold your foot in place. They transform your bike into an extension of your body. Whether you’re attacking a technical climb, sprinting through traffic, or grinding through a century ride, the right pedal platform gives you the stability to push harder and ride longer. If you’ve ever felt your foot slip off the pedal in a critical moment, you know this is a problem that demands a fix—and the fix starts here.
What Makes a Bike Pedal “the Best” for Control and Comfort?
The best bike pedal for control and comfort balances platform size, grip texture, and bearing quality to match your riding style. A pedal that excels in comfort on a long road ride may lack the aggressive pin configuration needed for technical mountain biking. For optimal control, look for a concave platform that cradles the foot, adjustable traction pins that dig into the sole, and a spindle that spins smoothly under load. Comfort comes from a wide enough platform to distribute pressure across the ball of your foot, reducing hot spots and fatigue. Pedals made from durable materials like CNC-machined aluminum or reinforced nylon offer the best mix of weight, strength, and vibration dampening. If you ride with flat shoes, prioritize pedals with a low-profile design to keep your feet close to the axle for better balance.
Why Does Pedal Grip Matter More Than You Think?
Pedal grip is the single most underrated factor in cycling performance because it directly affects your ability to transfer force to the drivetrain. When your foot slips, you lose watts, you destabilize the bike, and you increase the risk of a crash. Grip matters most in three situations: climbing out of the saddle, cornering at speed, and riding over wet or loose terrain. A pedal with aggressive, replaceable pins—typically eight to ten per side—creates mechanical engagement with the sole of your shoe. This prevents the micro-movements that lead to fatigue and inefficiency. For riders using clipless systems, grip is built into the cleat retention mechanism, but even here, the float and release angle affect how securely you’re locked in. Flat pedal riders should seek pedals with a knurled or textured surface between pins to provide secondary grip if the pins don’t fully bite.
How to Match Pedal Type to Your Riding Discipline
Choosing a pedal without considering your discipline is like buying tires for the wrong bike. Each riding style demands specific pedal characteristics.
Mountain Biking
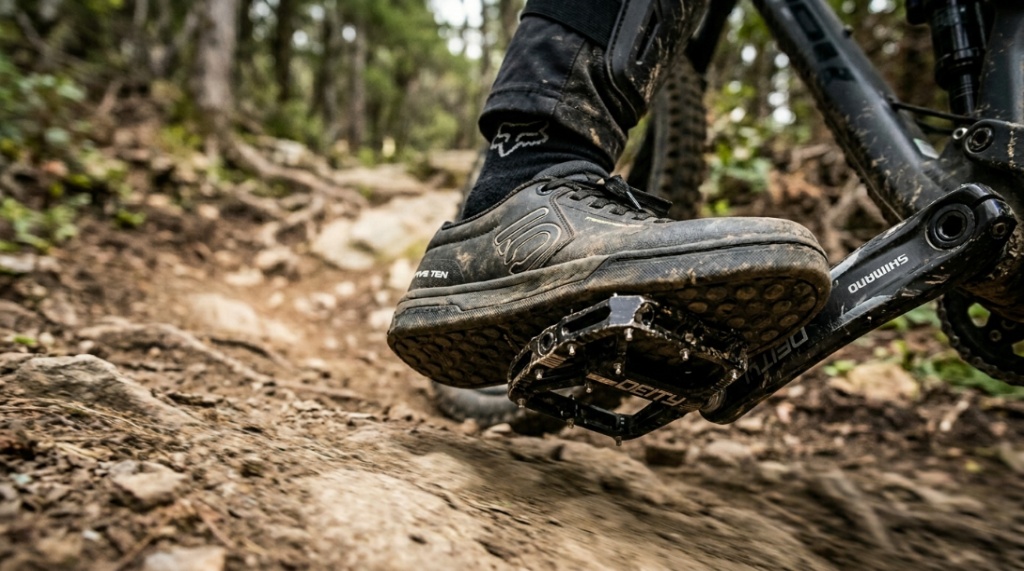
Flat pedals with tall, replaceable pins (6–8 mm) and a wide concave platform rule the trail. They allow quick foot placement and easy dabbing. A platform size of at least 110 mm by 110 mm ensures your foot stays centered during rough descents. Clipless options like SPD-style pedals are popular for cross-country riders who want efficient power transfer without the bulk.
Road Cycling
Clipless pedals with a large cleat interface (Look Keo or Shimano SPD-SL) maximize power transfer and reduce weight. A wide contact platform and low stack height improve aerodynamics and comfort over long distances. Look for pedals with adjustable release tension for personalized control.
Gravel and Commuting
Hybrid pedals offer a flat side for regular shoes and a clipless side for cycling shoes. This versatility is ideal for commuters who ride in street clothes but want the option to clip in on longer weekend rides. Durable nylon bodies and sealed bearings resist dirt and moisture.
BMX and Dirt Jumping
Small, narrow platforms with extremely aggressive pins provide maximum grip for explosive movements. These pedals prioritize bite over comfort, using thin nylon or aluminum bodies to avoid pedal strikes during tricks.
Which Pedal Material Offers the Best Durability and Value?
The material of your pedal body determines its weight, durability, and cost. Each option has clear trade-offs.
| Material | Durability | Weight | Grip | Cost | Best For |
|---|---|---|---|---|---|
| Nylon Composite | Moderate | Light | Good (with pins) | $30–$60 | Commuting, entry-level MTB |
| Forged Aluminum | High | Medium-Light | Excellent | $50–$150 | Trail riding, all-mountain |
| CNC-Machined Aluminum | Very High | Light | Superior | $100–$200+ | Enduro, downhill, performance |
| Titanium/Chromoly Spindle | Very High | Ultra-light | N/A (spindle only) | $200+ | Weight-conscious racers |
For most riders, forged or CNC-machined aluminum offers the best balance of weight, grip, and longevity. Nylon composite pedals are a budget-friendly alternative but tend to flex under heavy loads and wear out faster.
Can Flat Pedals Provide Better Control Than Clipless?
Yes, flat pedals can offer better control in technical off-road situations because they allow instant foot removal and repositioning. Flat pedals eliminate the “clip-in panic” that occurs when you need to put a foot down quickly. They also let you shift your foot position on the pedal to adjust for different terrain angles. However, clipless pedals provide superior power transfer on smooth surfaces and prevent foot slip during high-cadence spinning. For mountain bikers riding aggressive trails, flat pedals with good grip often feel more confident. For road cyclists and cross-country racers, clipless pedals are almost always the faster choice. The decision comes down to whether you prioritize raw pedaling efficiency or the ability to bail out instantly.
How to Choose the Right Pedal Size and Platform Shape
Pedal size and shape directly affect how stable and comfortable your foot feels. A platform that is too small forces your foot into an unstable position, while one that is too large can interfere with the crank arm or cause pedal strikes. For most adult riders, a platform width of 100–115 mm and a depth of 105–115 mm provides a solid foundation. Concave pedals—those that dip slightly in the center—naturally cup the shoe sole, creating a more secure connection than flat or convex shapes. The position of the traction pins matters too: pedals with pins concentrated at the edges offer better lateral grip, while pins spread across the center improve overall bite. If you have larger feet (US size 11+), look for pedals that advertise an extended platform, often called XL or large, to avoid overhang.
Upgrading your pedals is just one part of keeping your ride smooth. To ensure the rest of your drivetrain and components match that smooth feeling, learn how to Maintain a Mountain Bike for Long-Term Performance.
What Role Do Bearings and Spindles Play in Pedal Feel?
Smooth bearings and a robust spindle are what separate a premium pedal from a disposable one. The bearings inside the pedal body determine how freely the pedal spins, which affects your ability to get into the correct foot position quickly. Pedals with sealed cartridge bearings and a bushing (a sleeve bearing) offer the best longevity and low maintenance. A pure bushing system is cheaper but creates more friction and wears faster. High-end pedals use dual cartridge bearings with a bushing in the middle to handle both radial and axial loads. The spindle should be made from heat-treated chromoly steel or titanium for strength without bending. A pedal that wobbles or feels gritty after a few rides has poor bearing quality. When testing pedals in a shop, spin them by hand—they should rotate smoothly with a slight resistance and no grinding noise.
How to Maintain Your Pedals for Long-Lasting Grip and Performance
Proper maintenance keeps your pedals feeling fresh for years. Grip degrades when mud, sand, and worn shoe soles fill the gaps around traction pins. Follow this simple routine:
- Clean pins after every muddy ride using a stiff brush and water. Avoid degreaser near the pins—it can loosen them.
- Check pin tightness monthly. Vibration loosens pins over time, and a loose pin can damage the pedal threads.
- Grease the pedal threads before installation and annually after that to prevent seizing in the crank arm.
- Service or replace bearings every 12–18 months, depending on riding conditions. For sealed cartridges, this means replacing the bearing unit. For loose ball bearings, clean and repack with quality grease.
- Inspect the spindle for bends after hard impacts. A bent spindle will cause uneven wear and should be replaced immediately.
Which Pedal Features Improve Comfort on Long Rides?
Comfort on long rides comes from reducing pressure points and allowing natural foot movement. Look for pedals with a larger platform to distribute foot pressure across a wider area, preventing the “hot foot” sensation that plagues many cyclists. A slight concave shape helps cradle the arch of the foot without creating pressure ridges. For flat pedal riders, thinner pedal profiles (under 15 mm) keep the foot closer to the axle, improving stability and reducing ankle fatigue. Pin height also matters—overly aggressive pins can hurt through thin-soled shoes, while pins that are too short (< 4 mm) fail to grip. Choose pedals with adjustable pin height if you switch between soft and stiff soles. For clipless riders, float (the rotational freedom of the cleat) between 4–6 degrees reduces knee strain while still maintaining a secure connection. Avoid zero-float cleats unless you have a professional bike fit.
Is It Worth Paying More for Premium Bike Pedals?
Premium bike pedals are worth the investment if you ride regularly and demand reliability. A $150 pair of CNC-machined aluminum pedals will outlast three sets of $40 nylon pedals while offering better grip, smoother bearings, and a lighter weight. The cost premium also buys you replaceable parts—traction pins, bearings, and sometimes the entire body—so you can rebuild the pedal rather than throw it away. For casual riders who log fewer than 500 miles per year, mid-range pedals with sealed bearings and forged aluminum bodies provide excellent value. The sweet spot for most enthusiasts is between $60 and $120. At this price point, you get a durable platform, quality bearings, and aggressive grip without paying for unnecessary weight savings or exotic materials.
How to Test Pedal Grip Before You Buy
You cannot return a pedal that doesn’t grip your shoe, so test compatibility before purchasing. If you already own the shoes you plan to ride, bring a shoe to the bike shop and place it on the pedal. Press down firmly and try to twist your foot. A good pedal will resist rotation without requiring excessive force. Check that the pins contact the sole evenly across the full platform. If the shoe has deep tread lugs, ensure the pins can bite into the rubber rather than riding on top of the lugs. For clipless systems, test the engagement by clipping in and pulling upward—a secure connection should engage with a clear click and release with predictable pressure. Online shoppers can cross-reference shoe sole patterns with pedal photos; many brands now provide specific compatibility guidelines for their pedals with popular shoe models.
When Should You Replace Your Bike Pedals?
Replace your pedals when grip, bearings, or structural integrity decline. Obvious signs include: pins that have worn down below 3 mm in height and cannot be replaced; bearings that feel gritty, click, or wobble; a bent or cracked pedal body; or a spindle that shows visible corrosion or bending. If you notice your foot slipping on familiar terrain, the pedal is likely past its prime. Most quality pedals last 5,000–10,000 miles before needing replacement, though aggressive trail riders may wear out pins in 2,000 miles. Replacing worn pins costs far less than replacing the entire pedal, so always check if your model supports pin replacement.
Frequently Asked Questions
What is the difference between platform and clipless pedals?
Platform pedals are flat surfaces you push against with any shoe, relying on pins for grip. Clipless pedals require special shoes with a cleat that locks into the pedal mechanism, providing a direct connection for efficient power transfer.
How tight should bike pedal pins be?
Pedal pins should be tightened to about 2–3 Nm of torque using a 3 mm or 4 mm hex key. Over-tightening can strip the aluminum threads. Apply a drop of blue threadlocker to prevent loosening from vibration.
Can I use mountain bike pedals on a road bike?
Yes, you can use mountain bike flat pedals on a road bike, but it will reduce pedaling efficiency on smooth pavement. The wide platform and aggressive pins can also be uncomfortable with thin road shoes. Hybrid pedals are a better compromise.
Do wider pedals always provide more comfort?
Not always. A pedal slightly wider than your shoe sole (by about 5–10 mm on each side) provides stability. Excessively wide pedals can cause pedal strikes in corners and feel clunky. Match platform width to your shoe size for best comfort.
How often should I grease my pedal threads?
Grease the pedal threads every time you install them on a new crank set, and at least once a year if you keep the pedals on the same bike. This prevents galvanic corrosion between the aluminum pedal and steel crank threads.
Are titanium spindles worth the extra cost?
Titanium spindles are worth it only for weight-conscious racers. They save roughly 30–50 grams per pedal but cost significantly more. Most riders will not notice the weight difference in real-world riding.
What is the ideal pin height for trail riding?
For trail riding with soft-soled flat shoes, a pin height of 6–8 mm provides excellent grip without excessive discomfort. For stiff-soled shoes, 4–6 mm pins offer sufficient bite with less risk of sole puncture.
Conclusion
Choosing the best bike pedals for better control and comfort comes down to matching the platform, grip, and bearings to how and where you ride. Start by identifying your primary discipline—trail, road, gravel, or commute—then evaluate pedal materials and size. Prioritize pedals with replaceable pins and sealed cartridge bearings, as these features extend the life and performance of your investment. If you experience foot slips on technical sections or discomfort on long rides, a simple pedal upgrade can transform your cycling experience. Remember that the pedal grip for cycling don’t have to break the bank; they just need to fit your feet and your style. Try testing a friend’s pedals or visiting a shop to feel the difference yourself. Your feet—and your Strava times—will thank you.